
I was asked to run a demo on how to use Figma Variables.
This demo covers color and number variables.
The next demo will cover string and boolean variables.
Keep scrolling for some screenshots and commentary.

Let’s get started
I used the Magenta Prepaid Account Dashboard page as my example.
Note: Prepaid does not have a Design System, and is a primary instance of how we can use variables to maintain consistency from designer to designer.

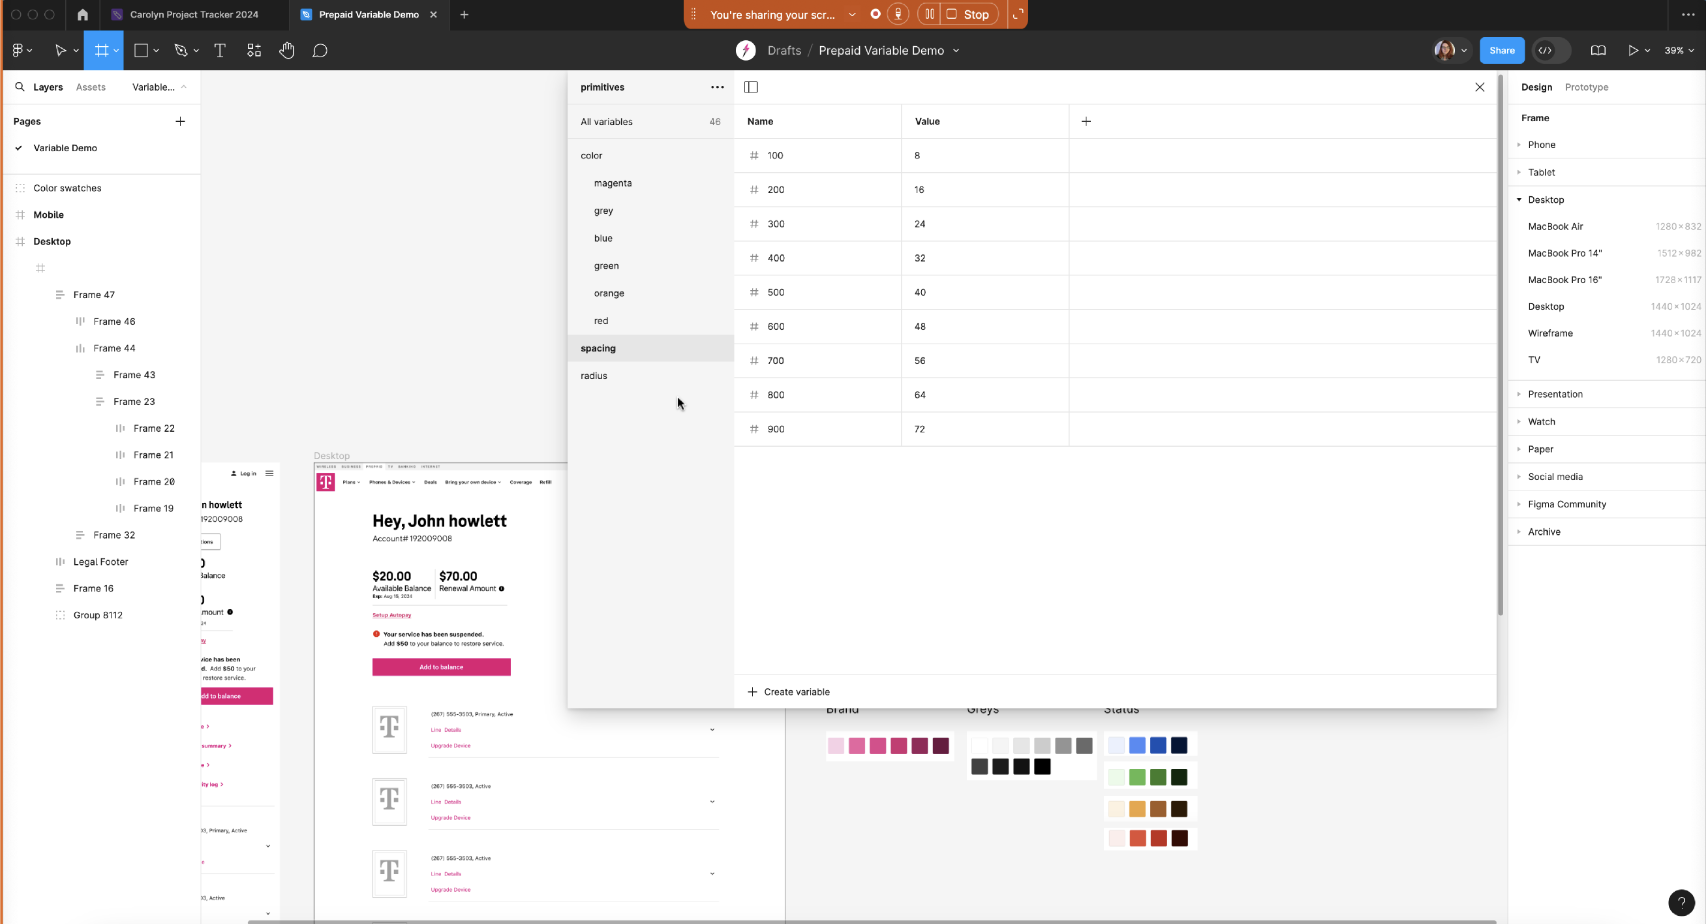
Step 1: Primitives
Select the “Local variable” icon in the right sidebar.
This will open a window that will prompt you to start creating variable.
Our first step will be to create variables for all the colors used by the brand.

I had my brand colors gathered ahead of time.
This way I was able to simply use the blotter tool to pick up the exact color.
We want to be sure to group like colors together.
For example, select all the instances of grey at once, right click to open menu, and select “New group”.
It’s important to name the group “color/greys”.
The “/” will create a subgroup.

Next, we want to create number variable to define our spacing.
Create variables for divisibles of 8, or whatever suits your projects spacing needs.
Group these together under the name “spacing”.
The same can be done for radiuses, or any other measurement defined by numbers.
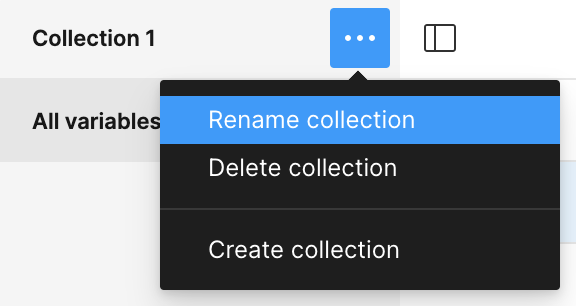
In preparation for step 2, open the menu of “Collection 1” in the top left corner of the window.
Rename this collection “Primitives”. These are the raw colors that will be linked to Tokens, or middle men variables defined by use case.
Create a new collection, and name it “Tokens”.
Step 2: Tokens
It’s time to add some variable to Tokens.
Let’s start with our CTAs.
We’ll name our variable “CTA-primary”, and then we will apply a value to it.
It is very important that while applying value, we switch to the libraries menu.
In the libraries menu, we will see color swatches of our primitives.
Select the primitive that should apply for primary CTAS.

Next, repeat this process for all your components with color.
Such as surface, borders, div, text, cta, icons, etc.
These components need to be tokenized in order to take full advantage of the flexibility the variables feature offers.

Next, make tokens for the number variable.
This will be any component in you design defined by a number.
In this example, we are defining the spacing tokens. For example, spacing, radius, div width, etc.

In this example, we are defining radiuses.
Repeat this process for any component in you design defined by a number.
For example, spacing, radius, div width, etc.
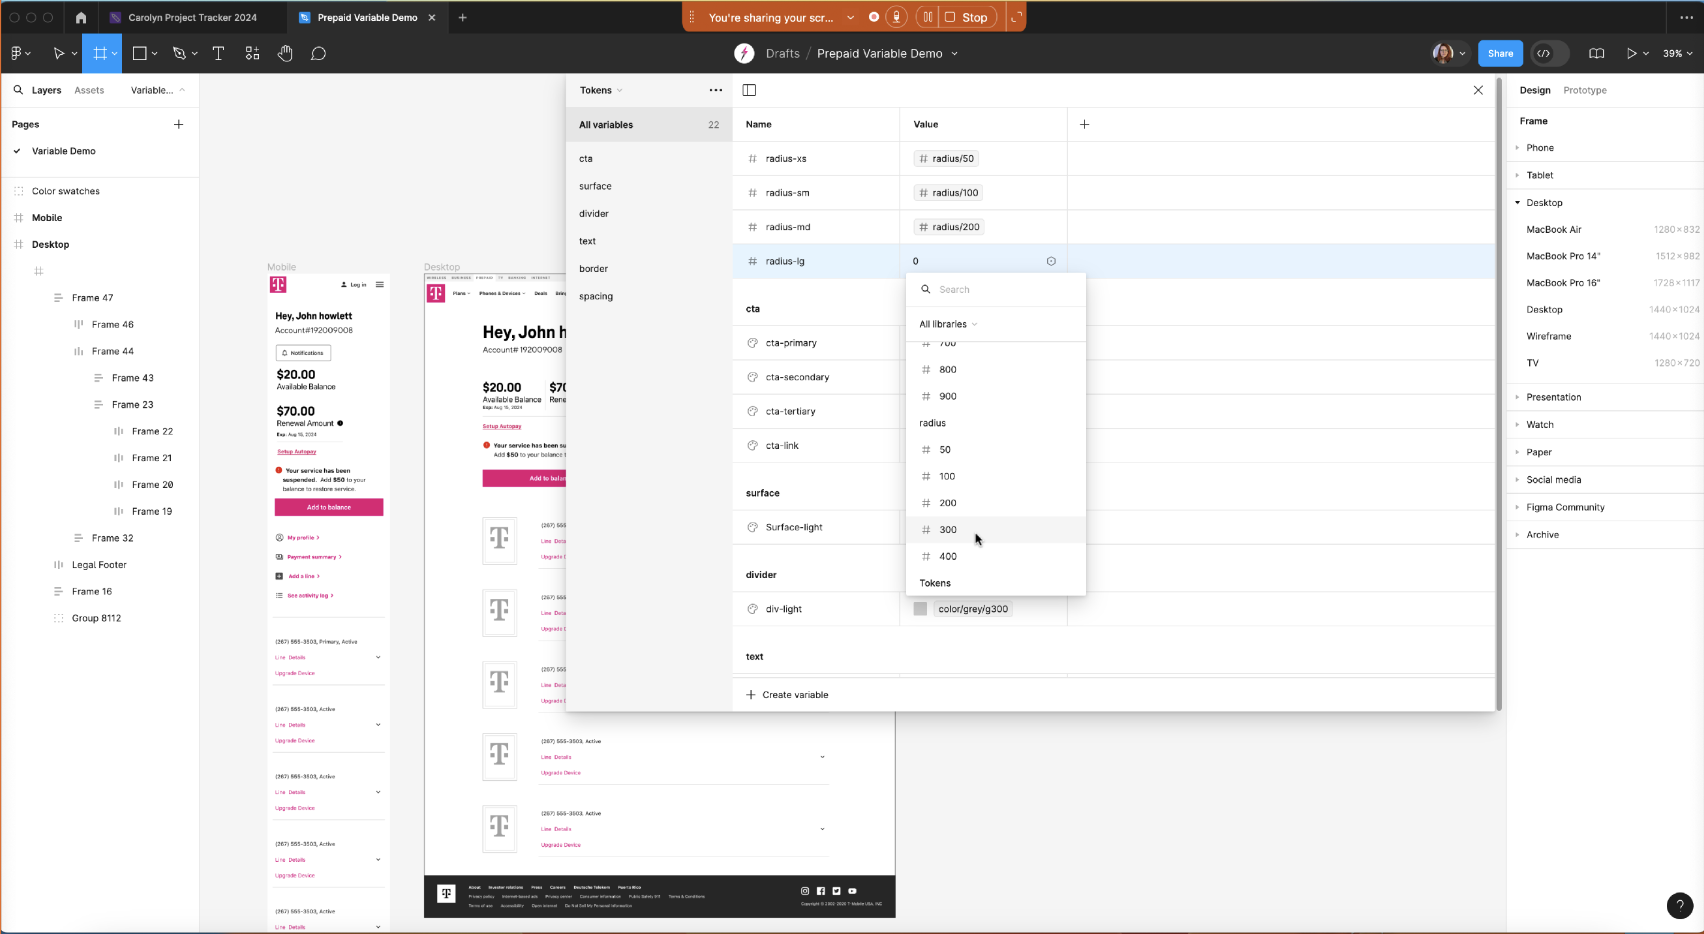
Don’t forgot to group like tokens!

Step 3: Applying to Your Design
Now we have all out primitives and tokens set up and it’s time to start applying them to your design.
Applying tokens to your design will make production faster when you need to edit spacing or color etc in the future.
This can even allow us to design for mobile, define tokens for desktop on the desktop artboard, and then paste the mobile components onto the desktop artboard.
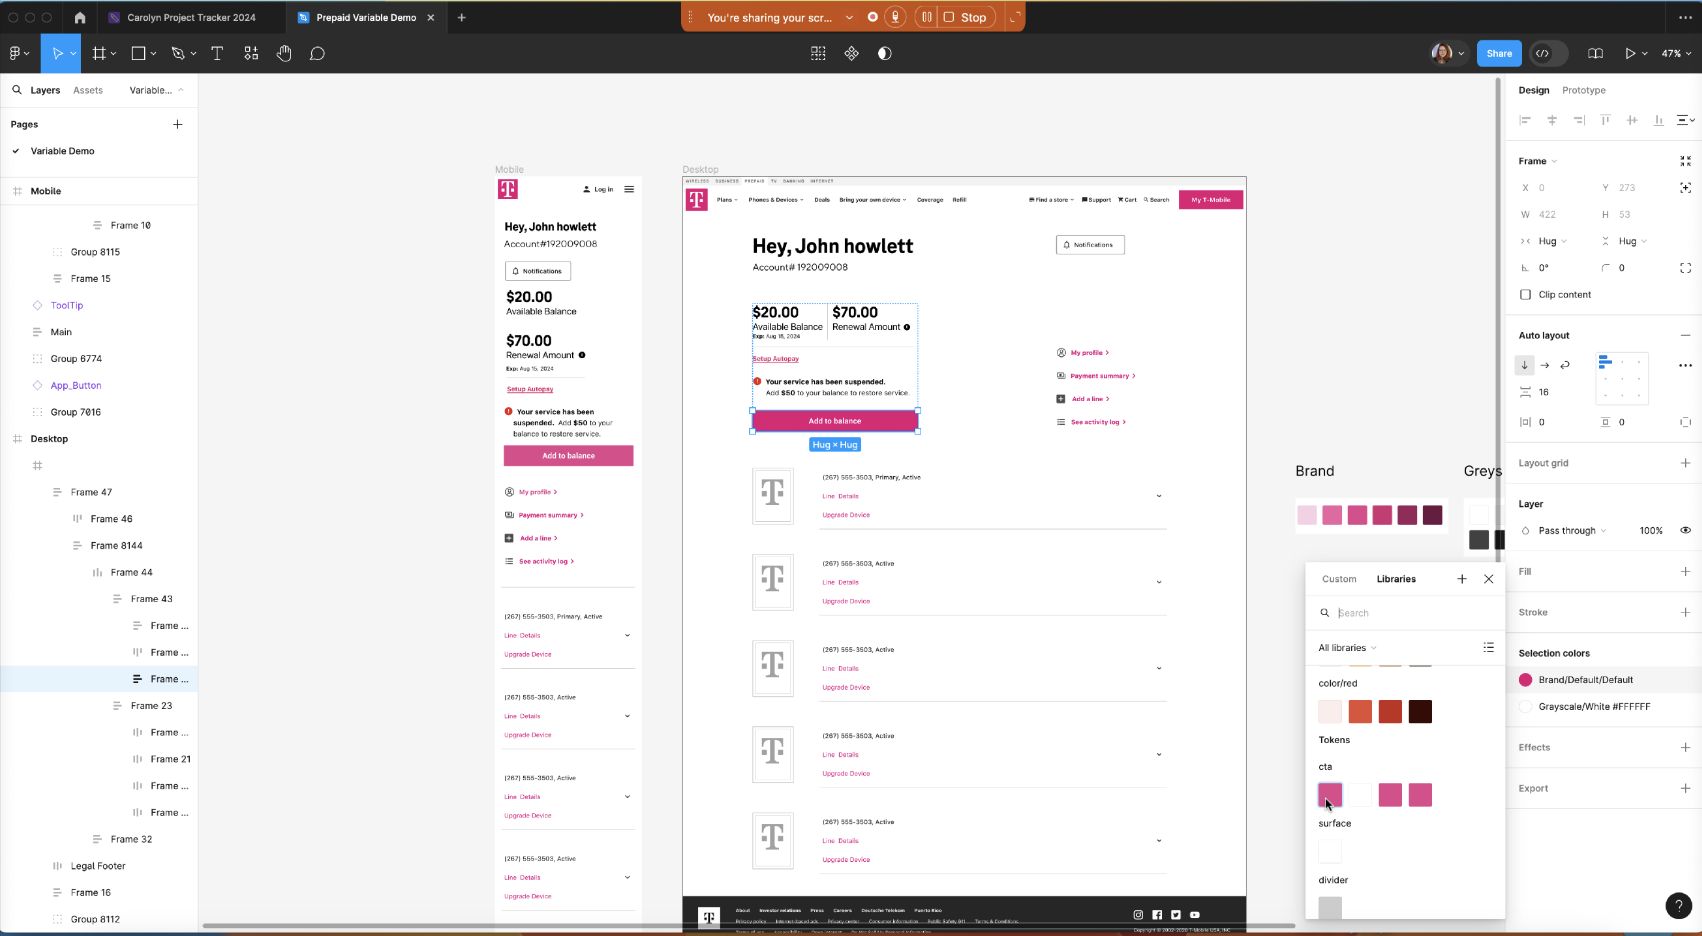
Apply to spacing by selecting spacing and adjusting in auto layout.

Be sure to select the component icon to choose from your tokens.

Apply your radius tokens.

Apply color tokens.
Now you are ready to benefit from the flexibility of tokens and variables!
If you have any questions, please don’t hesitate to reach out!
